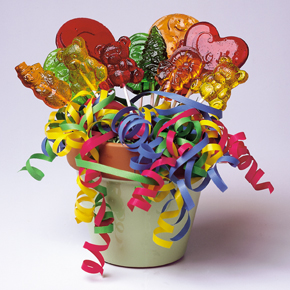
Saturday, December 29, 2012

Chocolate Chip Cookie Dough Truffles


Ingredients:
1 cup unsalted butter (2 sticks) at room temperature
1/2 cup light corn syrup
3/4 cup brown sugar
3/4 cup white sugar
1/2 teaspoon molasses
2 1/4 cup all purpose flour
1 teaspoon salt
1 teaspoon vanilla
2 cups chocolate chips
 
parchment paper
1 pound tempered chocolate or melted chocolate candy coating
dough scoop (or spoon)
little chefs:):)


Lets Begin!!!!  


Add first 5 ingredients in a bowl (softened butter, corn syrup,molasses,brown sugar, white sugar)


With an electric mixer, combine  for 5 minutes on high speed  until the dough  is light and fluffy

Gradually combine the salt and flour to bowl on low speed.  Mix until it is fully incorporated.

 Add your vanilla


Add 2 cups of chocolate chips and mix just until it is incorporated

 Tempting .... I know

Roll out small balls to dip into chocolate.  Now here I like to use a small dough scoop.  You can also use a spoon or melon baller.  A small scoop works best so that your truffles do not get too big. 

Temper your chocolate or for ease in the kitchen  you can use a chocolate candy coating.  I always use dipping tools.  It makes dipping the chocolate easier and also gives it a nice swirl on the top.  Dipping tools can be found on my web site at www.creativechocolatesupplies.com
Roll your cookie dough into a ball and drop into chocolate.  Lift out and tap to clean off excess chocolate.  Place your chocolate on parchment paper to harden.
 (These are the dipping tools)


Wednesday, December 19, 2012

Homemade Cough and Sore Throat Lozenges

Make your own lozenges! Homeopathic, herbal remedies have been used for centuries to treat the symptoms of the commom cold.
For homemade lozenges, just make hard candy by following either the stove-top or microwave recipe. Flavor the candy with one of the flavoring combinations suggested below or create one of your own! Pour into a candy mold (such as Candy Discs, Hexaganal or Rectangular break-up mold) or make hard candy suckers using one of our many Lollipop Molds.
  • LorAnn's Hot Chili Oil contains capsaicin (the compound in hot chilies that gives them heat). Studies have shown that capsaicin can lessen pain.
    Click here to read about the healing power of hot peppers.
  • Ginger Oil is an analgesic with anti-inflammatory properties
  • Clove Oil is a natural germicide and anticeptic with soothing properties
  • Menthol Eucalyptus is used in many over-the-counter lozenges to calm sore throats and control coughs.
Suggested flavor combinations:

Ginger & Lime
1 to 2 teaspoons LorAnn Natural Ginger Oil
1/2 teaspoon LorAnn Natural Lime Oil

Ginger & Lemon
1 to 2 teaspoons LorAnn Natural Ginger Oil
1/2 teaspoon LorAnn Natural Lemon Oil

Hot Chili & Mango
1/2 teaspoon LorAnn Hot Chili Oil
1 dram (approx. 1 teaspoon) LorAnn Mango Flavoring

Clove & Cinnamon
1 - 2 teaspoons LorAnn Natural Clove Oil
1/2 teaspoon LorAnn Cinnamon Flavoring Oil

Menthol Eucalyptus
1- 2 teaspoons Lorann Natural Menthol Eucalyptus Oil

Flavoring Oils to make your Cake Truffles


Use LorAnn Consentrated Oils to change the flavor combinations of your holiday Cake Pops.  This is a kid friendly recipe and a great way to get everyone in the kitchen. 

Flavor your Cake Ball Truffles any way you want!
Flavoring Ideas:
  • Yellow cake + banana creme flavor added to cream cheese frosting. Dip into milk chocolate wafers
  • White cake + strawberry flavor added to vanilla frosting colored with pink liquid food coloring. Dip into vanilla wafers. Decorate with pink-colored drizzle.
  • Chocolate cake + peppermint oil added to chocolate frosting. Dip into vanilla wafers.
  • White cake + lemon oil added to vanilla frosting. Dip into dark chocolate or vanilla wafers.

1 (18.25-ounce) package yellow, chocolate or white cake mix
1 (16-ounce) can cream cheese, vanilla or chocolate frosting
1 (1 lb. bag) confectioners' coating - candy wafers (vanilla, milk or dark chocolate)
1/8 to 1/2 teaspoon LorAnn Super Strength flavoring oil, any flavor (add to taste)


Liquid food coloring (to color frosting), optional
Powdered food coloring (to color vanilla wafers), optional
Candy sprinkles for decoration, optional

Directions:

  1. Bake cake in a 9" x 13" pan according to package directions. Allow cake to cool and crumble into a large mixing bowl.
  2. Spoon frosting into a medium bowl and add LorAnn flavoring, until desired flavor is achieved. Add about 3/4 of the frosting to the crumbled cake and stir to mix completely, adding more frosting if needed. Chill mixture in refrigerator for 30 - 60 minutes.
  3. Remove mixture from refrigerator. Roll into 1" size balls and place on a wax-paper lined baking sheet. Cover with plastic wrap and refrigerate for 20 minutes or until firm.
  4. Melt 1/4 package of the candy melts, according to package directions (balls are easiest to dip when the chocolate coating is warm so it's best to melt small amounts at a time).
  5. Remove cake balls from freezer. Line a cookie sheet with heavy-weight dipping paper or wax paper. Using a dipping fork, drop one ball into the melted chocolate; lift out with the fork and gently shake off excess. Place dipped cake ball onto the lined baking sheet. Continue until all cake balls have been dipped. If decorating with candy sprinkles, sprinkle tops before the chocolate has a chance to harden. If decorating with a chocolate drizzle, allow balls to harden completely before adding the drizzle. Store finished cake balls in the refrigerator in an air-tight container.


Helpful Hints:  Use our Chocolate dipping Tools and a re-usable squeeze bottle to finish off your cake truffles. 

Friday, December 7, 2012

Coal Candy

Coal Candy

2 cups granulated sugar
2/3 cup light corn syrup
¾ cup water
1 dram LorAnn flavoring oil ,(1 tsp.*) (or as desired) (we used Anise Oil)
LorAnn Black liquid food coloring (as desired)
 
 
Use of a candy thermometer is recommended
*Please note that our Cinnamon, Clove and Peppermint flavors are particularly potent. You may wish to reduce the amount used for these flavors

Directions:
Have all ingredients and tools assembled and within easy reach of the stove. Lightly spray an 8" X 8" pan with cooking spray (we recommend PAM).
In a 2-quart kettle or large saucepan, mix together sugar, corn syrup and water. Stir over medium heat until sugar dissolves. Insert candy thermometer if using, making certain it does not touch the bottom of the pan. Bring mixture to a boil, without stirring. Early in the cooking process, you can "wash down" any sugar crystals that form on the sides of the pan with a wet pastry brush. Continue to cook the syrup until the temperature reaches 260º F; add color. Do not stir; boiling action will incorporate color into syrup.
Remove from heat precisely at 300º F (temperature will continue rising), or until drops of syrup form hard, brittle threads in cold water. After boiling action has ceased, add flavor and stir. USE CAUTION WHEN ADDING FLAVORING TO AVOID RISING STEAM.
Pour syrup into prepared pan. Do not refrigerate. Cool completely. *Using the end of a wooden spoon, or other tool, pound candy into small chunks to simulate coal pieces. For best results, wrap candy in sucker bags or plastic wrap and secure with a twist tie.
*Before pounding, we transferred the slab of candy to a large pan with high sides such as a Dutch Oven and pounded the candy inside of the pan.


Thursday, December 6, 2012

Tuesday, December 4, 2012

Hard Candy Recipe

 Hard Candy Recipe

Ingredients:
2 cups granulated sugar
2/3 cup light corn syrup
¾ cup water
1 dram (1tsp.*) LorAnn super-strength flavoring, any flavor
LorAnn liquid food coloring (as desired)
Hard candy molds (optional)
Powdered sugar (optional)
Sucker bags & twist ties (optional)
Use of a candy thermometer is recommended

*Please note that our Cinnamon, Clove and Peppermint flavors are particularly potent. You may wish to reduce the amount used for these flavors.


Have all ingredients and tools assembled and within easy reach of the stove. The use of metal spoons and measuring utensils is recommended. Line with foil and lightly spray cookie sheet/jelly roll pan*. If using molds, lightly spray cavities of clean, dry candy molds with cooking spray (we recommend PAM). Insert sucker sticks. (If using two-piece plastic or aluminum molds, insert sticks after candy has been poured into molds.) If using molds, you may also want to spray a piece of aluminum foil with cooking spray. If after pouring the candy into the molds you have excess candy, you can pour it onto the foil.


1. In a 2-quart kettle or large saucepan, mix together sugar, corn syrup and water. Stir over medium heat until sugar dissolves.

2. Insert candy thermometer if using, making certain it does not touch the bottom of the pan. Bring mixture to a boil without stirring. 

3. Early in the cooking process, "wash down" any sugar crystals that form on the sides of the pan with a wet pastry brush.  


4. Continue to cook the syrup, without stirring, until the temperature reaches 260º F; add drops of coloring until desired hue is achieved. Do not stir; boiling action will incorporate color into syrup.

5. Remove from heat precisely at 300° F (temperature will continue rising), or until drops of syrup form hard, brittle threads in cold water (hard crack stage). After boiling action has ceased, add flavor and stir. USE CAUTION WHEN ADDING FLAVORING TO AVOID RISING STEAM.


 6. Carefully pour syrup into prepared molds or onto the prepared greased and foil lined cookie sheet. (As the sugar mixture begins to set up, you may want to score with a large knife to mark squares.) Do not refrigerate.


7. Cool completely. Break sheet candy into small pieces and dust with powdered sugar, if desired. Store in airtight containers between waxed paper. If making lollipops, do not dust with powdered sugar, but place in sucker bags and secure with twist ties. Store hard candy in a cool, dry place. Do not refrigerate.
*Another alternative is to pour the hot candy onto a heat-resistant surface covered in powdered sugar. When the candy is slightly cooled, it can be cut with well-oiled scissors into pillow-shaped pieces (you may want to wear heat-resistant gloves, such as rubber, to protect hands from heat).


LOOKING FOR AN EASIER OPTION:  CONSIDER OUR PREMADE MIXES.  SIMPLY ADD 1/3 CUP WATER TO MIXTURE AND BRING TO 260 DEGREES.  ADD FLAVORING AND COLOR AND POUR INTO MOLD.  visit our web site above to find this and many more products. 

Monday, December 3, 2012


3-D Edible Christmas Tree


Kit includes 3-D Chocolate Mold and Bag of Confectionary Coating.  6 oz of Green and 1 oz of Chocolate

Microwave Confectionary Coating in microwave for 30 seconds.  Remove and stir (note the heat from the bowl will continue to melt candy)  Place back in microwave for 10 more seconds if chunck remain.

Decorate using our Christmas Candy Writers and Sugar Pearls.


Happy Holidays!!!

White Chocolate Peppermint Fudge Christmas Tree Bites

White Chocolate Peppermint Fudge

Christmas Tree Bites


Items Needed:
 
2 bags Premium White Chocolate Chips
1   14 oz can of Sweetened Condensed Milk ( not evaporated milk)
1 dram peppermint extract oil
Red food color
 
Additional things needed: 
Microwave Safe Bowl
Measuring Cup
Spatula
Piping Bag


Combine White Chocolate Chips and Sweetened Condensed Milk in Microwave safe bowl.  Heat on full power for 1 min.  Remove and stir.  If lumps remain.  Continue to heat 20 seconds at a time until fully melted.  (Note:  the heat from the bowl will also aid in melting the chocolate.  Do not overheat)

Add 1/2 teaspoon Peppermint extract.  A little goes a long way!!!!!!!!!!!  Flavor to taste


Add 4 drops of red food coloring and stir to combine


Let fudge sit at room temperature until it thickens to the consistency of a thick icing.  This will take up to 45 min depending on your kitchen temperature.  If mixture is too warm... it will make your trees sag... if it is too hard.. it will be hard to pipe.  Once you put your fudge in your  piping bag you can warm it up if too thick by massaging the bag.  The heat from your hands will  soften your fudge.

Pipe your trees in an upward motion.  

Finish off with a white chocolate chip.  If further color is desired.. consider our Holiday Candy Writers.  Simply warm in a cup of water and snip off bottom to add detailed work. 


Friday, November 30, 2012

Santa Sleigh- Kids in the Kitchen

 
3-D Santa Sleigh
 
Items needed:
3-D Christmas Sleigh Mold
Chocolate or Confectionary Coating
Pastry Bag or Zip lock bag
Scissors
 
Note:  Chocolate will require tempering while Chocolate Confectionary Coating (used here) is easier to work with in the kitchen with little helping hands. 
 
Kits can be purchased at www.creativechocolatesupplies.com  Cake Decorating, Candy making and Chocolate making supplies.


You will need the chocolate mold along with a microwave safe bowl to get things started. 


Place chocolate confectionary coating in bowl. 
Place in microwave for 30 seconds.  Remove


Start to stir the candy.  Note:  the heat from the bowl will also aid in melting coating.  If chunks remain... place back into microwave and melt for 10 more seconds


Pour candy into mold

Save leftover chocolate.  You will need it to connect your pieces later


Shake mold gently up and down on the countertop.  This will help to fill in all the gaps in the mold and remove any air bubbles.  Add additional chocolate if mold is not filled.

Let mold sit on countertop until hard. (about 15 min)


Turn mold over on towel.
Melt reserved chocolate.  This will make the "glue" to hold each piece together


Place chocolate in pastry bag or zip lock bag and clip a very small piece off the corner


Start with the base of the sleigh and start attaching your pieces

 Let it dry before moved
Fill your sleigh with your favorite holiday treats


Rule of the kichen:  A good chef always tastes what they create!!!!!!!!!
Enjoy time with friends and family and make memories
in your kitchen.